Run a Validator Node
If this is the first time for you to setup a validator node, head to our Validator Bootcamp 🚀.
The following instructions are applicable across localnet, testnet, and mainnet.
If you are looking to learn how to compile and run a NEAR validator node natively (without containerization) for one of the following networks, this guide is for you.
Prerequisites
- Rust.
- Git
- Installed developer tools:
- MacOS
$ brew install cmake protobuf llvm awscli - Linux
$ apt update
$ apt install -y git binutils-dev libcurl4-openssl-dev zlib1g-dev libdw-dev libiberty-dev cmake gcc g++ python docker.io protobuf-compiler libssl-dev pkg-config clang llvm cargo awscli
- MacOS
Network optimizations
To optimize the network settings for better performance, execute the following commands:
MaxExpectedPathBDP=8388608
sudo sysctl -w net.core.rmem_max=$MaxExpectedPathBDP
sudo sysctl -w net.core.wmem_max=$MaxExpectedPathBDP
sudo sysctl -w net.ipv4.tcp_rmem="4096 87380 $MaxExpectedPathBDP"
sudo sysctl -w net.ipv4.tcp_wmem="4096 16384 $MaxExpectedPathBDP"
sudo sysctl -w net.ipv4.tcp_slow_start_after_idle=0
These changes do not persist across system restarts. To apply them automatically on boot, add the following in /etc/sysctl.d/local.conf:
net.core.rmem_max = 8388608
net.core.wmem_max = 8388608
net.ipv4.tcp_rmem = 4096 87380 8388608
net.ipv4.tcp_wmem = 4096 16384 8388608
net.ipv4.tcp_slow_start_after_idle = 0
How to use this document
This document is separated into sections by network ID. Although all of the sections have almost the exact same steps/text, we found it more helpful to create individual sections so you can easily copy-paste commands to quickly get your node running.
Choosing your nearcore version
When building your NEAR node you will have two branch options to choose from depending on your desired use:
master: (Experimental)- Use this if you want to play around with the latest code and experiment. This branch is not guaranteed to be in a fully working state and there is absolutely no guarantee it will be compatible with the current state of mainnet or testnet.
Latest stable release: (Stable)- Use this if you want to run a NEAR node for mainnet. For mainnet, please use the latest stable release. This version is used by mainnet validators and other nodes and is fully compatible with the current state of mainnet.
Latest release candidates: (Release Candidates)- Use this if you want to run a NEAR node for tesnet. For testnet, we first release a RC version and then later make that release stable. For testnet, please run the latest RC version.
(Optional) Enable debug logging
Note: Feel free to skip this step unless you need more information to debug an issue.
To enable debug logging, run neard like this:
$ RUST_LOG=debug,actix_web=info ./target/release/neard --home ~/.near run
localnet
1. Clone nearcore project from GitHub
First, clone the nearcore repository.
$ git clone https://github.com/near/nearcore
Next, checkout the release branch you need if you will not be using the default master branch. [ More info ]
$ git checkout master
2. Compile nearcore binary
In the repository run the following commands:
$ make neard
This will start the compilation process. It will take some time
depending on your machine power (e.g. i9 8-core CPU, 32 GB RAM, SSD
takes approximately 25 minutes). Note that compilation will need over
1 GB of memory per virtual core the machine has. If the build fails
with processes being killed, you might want to try reducing number of
parallel jobs, for example: CARGO_BUILD_JOBS=8 make neard.
The binary path is target/release/neard
For localnet, you also have the option to build in nightly mode (which is experimental and is used for cutting-edge testing). When you compile, use the following command:
$ cargo build --package neard --features nightly_protocol,nightly_protocol_features --release
3. Initialize working directory
The NEAR node requires a working directory with a couple of configuration files. Generate the initial required working directory by running:
$ ./target/release/neard --home ~/.near init --chain-id localnet
You can skip the
--homeargument if you are fine with the default working directory in~/.near. If not, pass your preferred location.
This command will create the required directory structure and will generate config.json, node_key.json, validator_key.json, and genesis.json files for localnet network.
config.json- Neard node configuration parameters.genesis.json- A file with all the data the network started with at genesis. This contains initial accounts, contracts, access keys, and other records which represents the initial state of the blockchain.node_key.json- A file which contains a public and private key for the node. Also includes an optionalaccount_idparameter.data/- A folder in which a NEAR node will write its state.validator_key.json- A file which contains a public and private key for localtest.nearaccount which belongs to the only local network validator.
4. Run the node
To run your node, simply run the following command:
$ ./target/release/neard --home ~/.near run
That's all. The node is running you can see log outputs in your console.
testnet
1. Clone nearcore project from GitHub
First, clone the nearcore repository.
$ git clone https://github.com/near/nearcore
$ cd nearcore
$ git fetch origin --tags
Checkout to the branch you need if not master (default). Latest release is recommended. Please check the releases page on GitHub.
$ git checkout tags/1.35.0 -b mynode
2. Compile nearcore binary
In the nearcore folder run the following commands:
$ make neard
This will start the compilation process. It will take some time
depending on your machine power (e.g. i9 8-core CPU, 32 GB RAM, SSD
takes approximately 25 minutes). Note that compilation will need over
1 GB of memory per virtual core the machine has. If the build fails
with processes being killed, you might want to try reducing number of
parallel jobs, for example: CARGO_BUILD_JOBS=8 make neard.
The binary path is target/release/neard
3. Initialize working directory
The NEAR node requires a working directory with a couple of configuration files. Generate the initial required working directory by running:
$ ./target/release/neard --home ~/.near init --chain-id testnet --download-genesis --download-config validator
You can skip the
--homeargument if you are fine with the default working directory in~/.near. If not, pass your preferred location.
This command will create the required directory structure and will generate config.json, node_key.json, and genesis.json files for testnet network.
genesis.json- A file with all the data the network started with at genesis. This contains initial accounts, contracts, access keys, and other records which represents the initial state of the blockchain.node_key.json- A file which contains a public and private key for the node. Also includes an optionalaccount_idparameter.data/- A folder in which a NEAR node will write it's state.config.json- should be replaced with one of the files listed below, see p.3.1
Heads up The genesis file for
testnetis big (6GB +) so this command will be running for a while and no progress will be shown.
3.1 Set up the config file for your needs
We have created basic configuration files for different purposes. The default file works well for any use case on localnet.
For testnet, the default file should be replaced with one of the following, depending on your requirements:
- Regular RPC Node stores recent info for all the shards, and can serve RPC queries for the last N epochs (N=5 by default).
- Archival RPC Node stores all the info starting for genesis, can serve RPC queries for the entire history. Requires significant storage.
- Validator Node is designed for the validators. Heavily optimized, does not store the full state, and cannot serve RPC queries.
4. Sync to the chain tip
The node is ready to be started. However, you must first sync up with the network. This means your node needs to download all the headers and blocks that other nodes in the network already have.
While snapshot-based syncing was previously the recommended default, we now recommend Epoch Sync —a faster, more lightweight method that allows a node to catch up from genesis without downloading a large state snapshot.
5. Run the node
To start your node simply run the following command:
$ ./target/release/neard --home ~/.near run
That's all. The node is running you can see log outputs in your console. It will download a bit of missing data since the last backup was performed but it shouldn't take much time.
6. Prepare to become a validator
To start validating we need to prepare by installing nodejs. Check Nodesource repository for details on how to install nodejs on your distro. For Ubuntu, this will be done as follows:
$ sudo apt-get update
$ sudo apt-get install -y ca-certificates curl gnupg
$ sudo mkdir -p /etc/apt/keyrings
$ curl -fsSL https://deb.nodesource.com/gpgkey/nodesource-repo.gpg.key | sudo gpg --dearmor -o /etc/apt/keyrings/nodesource.gpg

$ echo "deb [signed-by=/etc/apt/keyrings/nodesource.gpg] https://deb.nodesource.com/node_20.x nodistro main" | sudo tee /etc/apt/sources.list.d/nodesource.list

$ sudo apt-get update
$ sudo apt-get install nodejs -y
$ sudo apt-get install npm -y
$ sudo npm install -g near-cli
7. Install and check near-cli
Next we'll need to install near-cli with npm:
$ sudo npm install -g near-cli
$ export NEAR_ENV=testnet
$ near validators current
You should see a list of current validator for the network.
To make the NEAR_ENV persistent, add it to your bashrc:
$ echo 'export NEAR_ENV=testnet' >> ~/.bashrc
8. Create a wallet
- TestNet: https://wallet.testnet.near.org/
Node: this wallet is deprecated in favor of other wallets (i.e https://app.mynearwallet.com/) and near-cli will be updated soon to reflect this.
9. Authorize Wallet Locally
A full access key needs to be installed locally to be able transactions via NEAR-CLI.
- You need to run this command:
$ near login
Note: This command launches a web browser allowing for the authorization of a full access key to be copied locally.
1 – Copy the link in your browser

2 – Grant Access to Near CLI
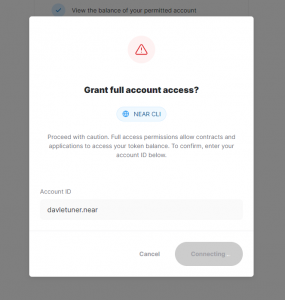
3 – After Grant, you will see a page like this, go back to console
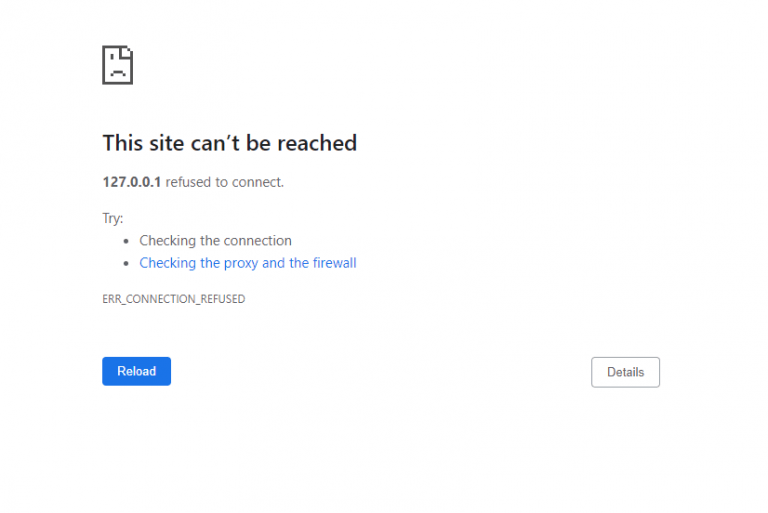
4 – Enter your wallet and press Enter

Node: this wallet.testnet.near.org is deprecated in favor of other wallets (i.e https://app.mynearwallet.com/) and near-cli will be updated soon to reflect this.
10. Prepare validator key
When step #8 is completed, near-cli will create a key in your ~/.near-credentials/mainnet/ directory. We should use this for our validator. As such we move it to .near directory, add pool factory to accound it and change private_key to secret_key:
$ cp ~/.near-credentials/testnet/<accountId>.testnet.json ~/.near/validator_key.json
$ sed -i -e "s/<accountId>.testnet/<accountId>.pool.f863973.m0/g"  ~/.near/validator_key.json
$ sed -i -e 's/private_key/secret_key/g' ~/.near/validator_key.json
11. Deploy a staking pool
To create a staking pool on the network, we need to call the create_staking_pool contract with required parameters and deploy it to the indicated accountId:
$ near call pool.f863973.m0 create_staking_pool '{"staking_pool_id": "<pool_name>", "owner_id": "<pool_owner_accountId>", "stake_public_key": "<public_key>", "reward_fee_fraction": {"numerator": <fee>, "denominator": 100}}' --accountId="<accountId>" --amount=30 --gas=300000000000000
From the command above, you need to replace:
Pool Name: Staking pool name, the factory automatically adds its name to this parameter, creating {pool_name}.{staking_pool_factory} Examples:
myamazingpool.pool.f863973.m0futureisnearyes.pool.f863973.m0
Pool Owner ID: The NEAR account that will manage the staking pool. Usually your main NEAR account.
Public Key: The public key from your validator_key.json file.
Fee: The fee the pool will charge in percents in 0-100 range.
Account Id: The NEAR account deploying the staking pool. This needs to be a named account initialized within near-cli (be present in ~/.near-credentials/mainnet/ directory and exist on the network). It can be the same account as the pool owner id
Be sure to have at least 30 NEAR available, it is the minimum required for storage.
You will see something like this:

If there is a “True” at the End. Your pool is created.
To change the pool parameters, such as changing the amount of commission charged to 1% in the example below, use this command:
$ near call <pool_name> update_reward_fee_fraction '{"reward_fee_fraction": {"numerator": 1, "denominator": 100}}' --accountId <account_id> --gas=300000000000000
12. Propose to start validating
NOTE: Validator must be fully synced before issuing a proposal or depositing funds. Check the neard logs to see if syncing is completed.
In order to get a validator seat you must first submit a proposal with an appropriate amount of stake. Proposals are sent for epoch +2. Meaning if you send a proposal now, if approved, you would get the seat in 3 epochs. You should submit a proposal every epoch to ensure your seat. To send a proposal we use the ping command. A proposal is also sent if a stake or unstake command is sent to the staking pool contract.
To note, a ping also updates the staking balances for your delegators. A ping should be issued each epoch to keep reported rewards current on the pool contract.
Deposit and Stake NEAR
Deposit token to a pool (can be done using any account, not necessary the one created/used in steps above):
$ near call <staking_pool_id> deposit_and_stake --amount <amount> --accountId <accountId> --gas=300000000000000
Ping
A ping issues a new proposal and updates the staking balances for your delegators. A ping should be issued each epoch to keep reported rewards current.
Command:
$ near call <staking_pool_id> ping '{}' --accountId <accountId> --gas=300000000000000
Once above is completed, verify your validator proposal status:
$ near proposals
Your validator pool should have "Proposal(Accepted)" status
mainnet
1. Clone nearcore project from GitHub
First, clone the nearcore repository.
$ git clone https://github.com/near/nearcore
$ cd nearcore
$ git fetch origin --tags
Next, checkout the release branch you need you will not be using the
default master branch. Please check the releases page on
GitHub for the latest
release.
For more information on choosing between master and latest release branch [ click here ].
$ git checkout tags/1.26.1 -b mynode
2. Compile nearcore binary
In the nearcore folder run the following commands:
$ make neard
This will start the compilation process. It will take some time
depending on your machine power (e.g. i9 8-core CPU, 32 GB RAM, SSD
takes approximately 25 minutes). Note that compilation will need over
1 GB of memory per virtual core the machine has. If the build fails
with processes being killed, you might want to try reducing number of
parallel jobs, for example: CARGO_BUILD_JOBS=8 make neard.
The binary path is target/release/neard
3. Initialize working directory
In order to work NEAR node requires to have working directory and a couple of configuration files. Generate the initial required working directory by running:
$ ./target/release/neard --home ~/.near init --chain-id mainnet --download-config validator
You can skip the
--homeargument if you are fine with the default working directory in~/.near. If not, pass your preferred location.
This command will create the required directory structure by generating a config.json, node_key.json, and downloads a genesis.json for mainnet.
genesis.json- A file with all the data the network started with at genesis. This contains initial accounts, contracts, access keys, and other records which represents the initial state of the blockchain.node_key.json- A file which contains a public and private key for the node. Also includes an optionalaccount_idparameter which is required to run a validator node (not covered in this doc).data/- A folder in which a NEAR node will write it's state.config.json- should be replaced with one of the files listed below, see p.3.1
3.1 Set up the config file for your needs
We have created basic configuration files for different purposes. The default file works well for any use case on localnet.
For mainnet, the default file should be replaced with one of the following, depending on your requirements:
- Regular RPC Node stores recent info for all the shards, and can serve RPC queries for the last N epochs (N=5 by default).
- Archival RPC Node stores all the info starting for genesis, can serve RPC queries for the entire history. Requires significant storage.
- Validator Node is designed for the validators. Heavily optimized, does not store the full state, and cannot serve RPC queries.
4. Sync to the chain tip
The node is ready to be started. However, you must first sync up with the network. This means your node needs to download all the headers and blocks that other nodes in the network already have.
While snapshot-based syncing was previously the recommended default, we now recommend Epoch Sync —a faster, more lightweight method that allows a node to catch up from genesis without downloading a large state snapshot.
5. Run the node
To start your node simply run the following command:
$ ./target/release/neard --home ~/.near run
The node is running and you can see log outputs in your console. It will download the missing data since the last snapshot was performed but it shouldn't take much time.
6. Prepare to become a validator
To start validating we need to prepare by installing nodejs. Check Nodesource repository for details on how to install nodejs on your distro. For Ubuntu, this will be done as follows:
$ sudo apt-get update
$ sudo apt-get install -y ca-certificates curl gnupg
$ sudo mkdir -p /etc/apt/keyrings
$ curl -fsSL https://deb.nodesource.com/gpgkey/nodesource-repo.gpg.key | sudo gpg --dearmor -o /etc/apt/keyrings/nodesource.gpg

$ echo "deb [signed-by=/etc/apt/keyrings/nodesource.gpg] https://deb.nodesource.com/node_20.x nodistro main" | sudo tee /etc/apt/sources.list.d/nodesource.list

$ sudo apt-get update
$ sudo apt-get install nodejs -y
$ sudo apt-get install npm -y
$ sudo npm install -g near-cli
7. Install and check near-cli
Next we'll need to install near-cli with npm:
$ sudo npm install -g near-cli
$ export NEAR_ENV=mainnet
$ near validators current
You should see a list of current validator for the network.
To make the NEAR_ENV persistent, add it to your bashrc:
echo 'export NEAR_ENV=mainnet' >> ~/.bashrc
8. Create a wallet
- MainNet: https://wallet.near.org/
Node: this wallet.testnet.near.org is deprecated in favor of other wallets (i.e https://app.mynearwallet.com/) and near-cli will be updated soon to reflect this.
9. Authorize Wallet Locally
A full access key needs to be installed locally to be able transactions via NEAR-CLI.
- You need to run this command:
near login
Note: This command launches a web browser allowing for the authorization of a full access key to be copied locally.
1 – Copy the link in your browser
2 – Grant Access to Near CLI
3 – After Grant, you will see a page like this, go back to console
4 – Enter your wallet and press Enter
Node: this wallet.testnet.near.org is deprecated in favor of other wallets (i.e https://app.mynearwallet.com/) and near-cli will be updated soon to reflect this.
10. Prepare validator key
When step #8 is completed, near-cli will create a key in your ~/.near-credentials/mainnet/ directory. We should use this for our validator. As such we move it to .near directory, add pool factory to accound it and change private_key to secret_key:
$ cp ~/.near-credentials/testnet/<accountId>.mainnet.json ~/.near/validator_key.json
$ sed -i -e "s/<accountId>.mainnet/<accountId>.poolv1.near/g"  ~/.near/validator_key.json
$ sed -i -e 's/private_key/secret_key/g' ~/.near/validator_key.json
11. Deploy a staking pool
To create a staking pool on the network, we need to call the create_staking_pool contract with required parameters and deploy it to the indicated accountId:
$ near call poolv1.near create_staking_pool '{"staking_pool_id": "<pool_name>", "owner_id": "<pool_owner_accountId>", "stake_public_key": "<public_key>", "reward_fee_fraction": {"numerator": <fee>, "denominator": 100}}' --accountId="<accountId>" --amount=30 --gas=300000000000000
From the command above, you need to replace:
Pool Name: Staking pool name, the factory automatically adds its name to this parameter, creating {pool_name}.{staking_pool_factory} Examples:
myamazingpool.poolv1.nearfutureisnearyes.poolv1.near
Pool Owner ID: The NEAR account that will manage the staking pool. Usually your main NEAR account.
Public Key: The public key from your validator_key.json file.
Fee: The fee the pool will charge in percents in 0-100 range.
Account Id: The NEAR account deploying the staking pool. This needs to be a named account initialized within near-cli (be present in ~/.near-credentials/mainnet/ directory and exist on the network). It can be the same account as the pool owner id
Be sure to have at least 30 NEAR available, it is the minimum required for storage.
You will see something like this:
If there is a “True” at the End. Your pool is created.
To change the pool parameters, such as changing the amount of commission charged to 1% in the example below, use this command:
$ near call <pool_name> update_reward_fee_fraction '{"reward_fee_fraction": {"numerator": 1, "denominator": 100}}' --accountId <account_id> --gas=300000000000000
12. Propose to start validating
NOTE: Validator must be fully synced before issuing a proposal or depositing funds. Check the neard logs to see if syncing is completed.
In order to get a validator seat you must first submit a proposal with an appropriate amount of stake. Proposals are sent for epoch +2. Meaning if you send a proposal now, if approved, you would get the seat in 3 epochs. You should submit a proposal every epoch to ensure your seat. To send a proposal we use the ping command. A proposal is also sent if a stake or unstake command is sent to the staking pool contract.
To note, a ping also updates the staking balances for your delegators. A ping should be issued each epoch to keep reported rewards current on the pool contract.
Deposit and Stake NEAR
Deposit token to a pool (can be done using any account, not necessary the one created/used in steps above):
$ near call <staking_pool_id> deposit_and_stake --amount <amount> --accountId <accountId> --gas=300000000000000
Ping
A ping issues a new proposal and updates the staking balances for your delegators. A ping should be issued each epoch to keep reported rewards current.
Command:
$ near call <staking_pool_id> ping '{}' --accountId <accountId> --gas=300000000000000
Once above is completed, verify your validator proposal status:
$ near proposals
Your validator pool should have "Proposal(Accepted)" status
Got a question?
Ask it on StackOverflow!