NEAR Validator Bootcamp 🚀
Validator Onboarding FAQ's
What’s the current protocol upgrade that will increase the number of validators on Mainnet?
The next upgrade to increase the number of mainnet validators will introduce Chunk-Only Producers, and is currently slated for Q3 2022.
How do I join NEAR as a validator on the Mainnet? What steps do I need to take?
- Find out more about how to become a validator, head to https://near-nodes.io/validator
- Join the Open Shards Alliance Server to find out more on how to run nodes and participate on the guildnet.
What are the future plans for NEAR Protocol?
Learn about the protocol roadmap here https://near.org/blog/near-launches-simple-nightshade-the-first-step-towards-a-sharded-blockchain/.
LESSON 1 - OVERVIEW OF NEAR
Blockchain Technology
Blockchain is a new technology originally developed by Bitcoin. The term most often used to describe blockchain technology is a “public ledger”. An easy way to describe it, is that it’s similar to your banking statement that keeps track of balances, debits, and credits, with several key differences:
- Limitless – Transactions can be added as long as the network is up and running
- Unchangeable – Immutable once written (validated), it can not be modified
- Decentralized – Maintained by individual nodes called validators worldwide
- Verifiable – Transactions are verified via consensus by decentralized validators via a Proof of Stake (POS) or Proof of Work (POW) algorithm
Smart Contracts
Not all blockchains are equal. While some only allow the processing of transactions (balances, debits, and credits), blockchains like NEAR and Ethereum offer another layer of functionality that enables programs to run on the blockchain known as smart contracts.
An easy way to think about it is that “smart contract” enabled blockchains are like supercomputers. They allow for users and developers to pay a fee to use CPU/Memory (resources), and Disk (storage) on a global scale.
However, it does not make sense to store everything on the blockchain as it would be too expensive. Web front-ends (HTML, CSS, and JS) are served from web hosting, Github, or Skynet, and images are often stored on InterPlanetary File Systems (IPFS) like Filecoin or Arweave.
Sharding
As the founding blockchains, Bitcoin and Ethereum, began to grow, limitations presented themselves. They could only manage to process a specific number of transactions in a block/space of time. This created severe bottlenecks with processing, wait times, and also significantly increased the transaction fee required to have transactions processed.
Sharding is a technological advancement that allows blockchains to scale and to provide more throughput, while decreasing wait times and keeping transaction fees low. It accomplishes this by creating additional shards as the use of the network grows.
About NEAR
NEAR Protocol was designed with a best-of-breed approach in mind. It focuses on fixing the bottlenecks of the earlier blockchains while also enhancing the user experience to enable broader adoption of blockchain technology by existing Web2 users and developers. NEAR is a sharded Proof of Stake (POS) blockchain.
Key Features
- Award-Winning Team – Top Programmers in the world
- Proof of Stake (POS)
- Unlimited Shards
- User Experience (UX)
- Developer Experience (DX)
- Rainbow Bridge to ETH – Bridge assets to and from ETH
- Aurora – Run native ETH apps built-in solidity
Technology Stack
- Rust – Primary Smart Contract Language
- Assembly Script – Alternant Smart Contract Language (similar to TypeScript)
- NodeJS – Tooling
- Javascript / React / Angular – Frontends
LESSON 2 - NEAR-CLI
NEAR-CLI is a command-line interface that communicates with the NEAR blockchain via remote procedure calls (RPC):
- Setup and Installation NEAR CLI
- View Validator Stats
Note: For security reasons, it is recommended that NEAR-CLI be installed on a different computer than your validator node and that no full access keys be kept on your validator node.
Setup NEAR-CLI
First, let's make sure the Debian machine is up-to-date.
sudo apt update && sudo apt upgrade -y
Install developer tools, Node.js, and npm
First, we will start with installing Node.js and npm:
curl -sL https://deb.nodesource.com/setup_17.x | sudo -E bash -
sudo apt install build-essential nodejs
PATH="$PATH"
Check Node.js and npm version:
node -v
v17.x.x
npm -v
8.x.x
Install NEAR-CLI
Here's the Github Repository for NEAR CLI.: https://github.com/near/near-cli. To install NEAR-CLI, unless you are logged in as root, which is not recommended you will need to use sudo to install NEAR-CLI so that the near binary is saved to /usr/local/bin
sudo npm install -g near-cli
Validator Stats
Now that NEAR-CLI is installed, let's test out the CLI and use the following commands to interact with the blockchain as well as to view validator stats. There are three reports used to monitor validator status:
Environment
The environment will need to be set each time a new shell is launched to select the correct network.
Networks:
- GuildNet
- TestNet
- MainNet
Command:
export NEAR_ENV=<network> (use guildnet / testnet / mainnet)
Proposals
A proposal by a validator indicates they would like to enter the validator set, in order for a proposal to be accepted it must meet the minimum seat price.
Command:
near proposals
Validators Current
This shows a list of active validators in the current epoch, the number of blocks produced, number of blocks expected, and online rate. Used to monitor if a validator is having issues.
Command:
near validators current
Validators Next
This shows validators whose proposal was accepted one epoch ago, and that will enter the validator set in the next epoch.
Command:
near validators next
LESSON 3 - SETUP UP A VALIDATOR
In this lesson you will learn about:
- Setting up a Node
- Difference between MainNet and TestNet
- Compiling Nearcore for MainNet
- Genesis file (genesis.json)
- Config file (config.json)
Server Requirements
For Block Producing Validators, please refer to the Validator Hardware
For Chunk-Only Producers (an upcoming role on NEAR), please see the hardware requirement below:
| Hardware | Chunk-Only Producer Specifications |
|---|---|
| CPU | 4-Core CPU with AVX support |
| RAM | 8GB DDR4 |
| Storage | 500GB SSD |
Install required software & set the configuration
Prerequisites:
Before you start, you may want to confirm that your machine has the right CPU features. For more hardware specific information, please take a look of the Hardware requirement.
lscpu | grep -P '(?=.*avx )(?=.*sse4.2 )(?=.*cx16 )(?=.*popcnt )' > /dev/null \
  && echo "Supported" \
  || echo "Not supported"
Supported
Next, let's make sure the Debian machine is up-to-date.
sudo apt update && sudo apt upgrade -y
Install developer tools:
sudo apt install -y git binutils-dev libcurl4-openssl-dev zlib1g-dev libdw-dev libiberty-dev cmake gcc g++ python docker.io protobuf-compiler libssl-dev pkg-config clang llvm cargo
Install Python pip:
sudo apt install python3-pip
Set the configuration:
USER_BASE_BIN=$(python3 -m site --user-base)/bin
export PATH="$USER_BASE_BIN:$PATH"
Install Building env
sudo apt install clang build-essential make
Install Rust & Cargo
curl --proto '=https' --tlsv1.2 -sSf https://sh.rustup.rs | sh
You will see the following:
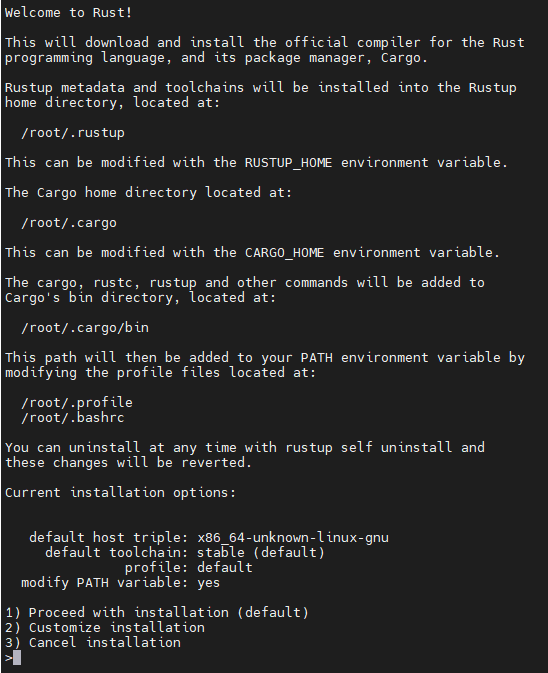
Press 1 and press enter.
Source the environment
source $HOME/.cargo/env
Clone nearcore project from GitHub
First, clone the nearcore repository.
git clone https://github.com/near/nearcore
cd nearcore
git fetch origin --tags
Checkout to the branch you need. Latest unstable release is recommended if you are running on testnet and latest stable version is recommended if you are running on mainnet. Please check the releases page on GitHub.
git checkout tags/<version> -b mynode
Compile nearcore binary
In the nearcore folder run the following commands:
make neard
The binary path is target/release/neard. If you are seeing issues, it is possible that cargo command is not found. Make sure sudo apt install cargo. Compiling nearcore binary may take a little while.
Initialize working directory
In order to work properly, the NEAR node requires a working directory and a couple of configuration files. Generate the initial required working directory by running:
./target/release/neard --home ~/.near init --chain-id <network> --download-genesis

This command will create the directory structure and will generate config.json, node_key.json, and genesis.json on the network you have passed. The genesis file for testnet is big (6GB +) so this command will be running for a while and no progress will be shown.
config.json- Configuration parameters which are responsive for how the node will work. The config.json contains needed information for a node to run on the network, how to communicate with peers, and how to reach consensus. Although some options are configurable. In general validators have opted to use the default config.json provided.genesis.json- A file with all the data the network started with at genesis. This contains initial accounts, contracts, access keys, and other records which represents the initial state of the blockchain. The genesis.json file is a snapshot of the network state at a point in time. In contacts accounts, balances, active validators, and other information about the network. On MainNet, it is the state of what the network looked like at launch. On testnet or guildnet, it can include a more intermediate state if the network was hard-forked at one point.node_key.json- A file which contains a public and private key for the node. Also includes an optionalaccount_idparameter which is required to run a validator node (not covered in this doc).data/- A folder in which a NEAR node will write it's state.
Replace the config.json
rm ~/.near/config.json
wget -O ~/.near/config.json https://s3-us-west-1.amazonaws.com/build.nearprotocol.com/nearcore-deploy/<network>/validator/config.json
Get data backup
The node is ready to be started. However, you must first sync up with the network. This means your node needs to download all the headers and blocks that other nodes in the network already have.
The latest daily snapshots are made available to the public by FastNear, and can be used to set up a validator node. For detailed instructions, please refer to this guide.
NOTE: Make sure you have enough disk space to unpack inside the data folder.
Run the node
To start your node simply run the following command:
cd nearcore
./target/release/neard --home ~/.near run
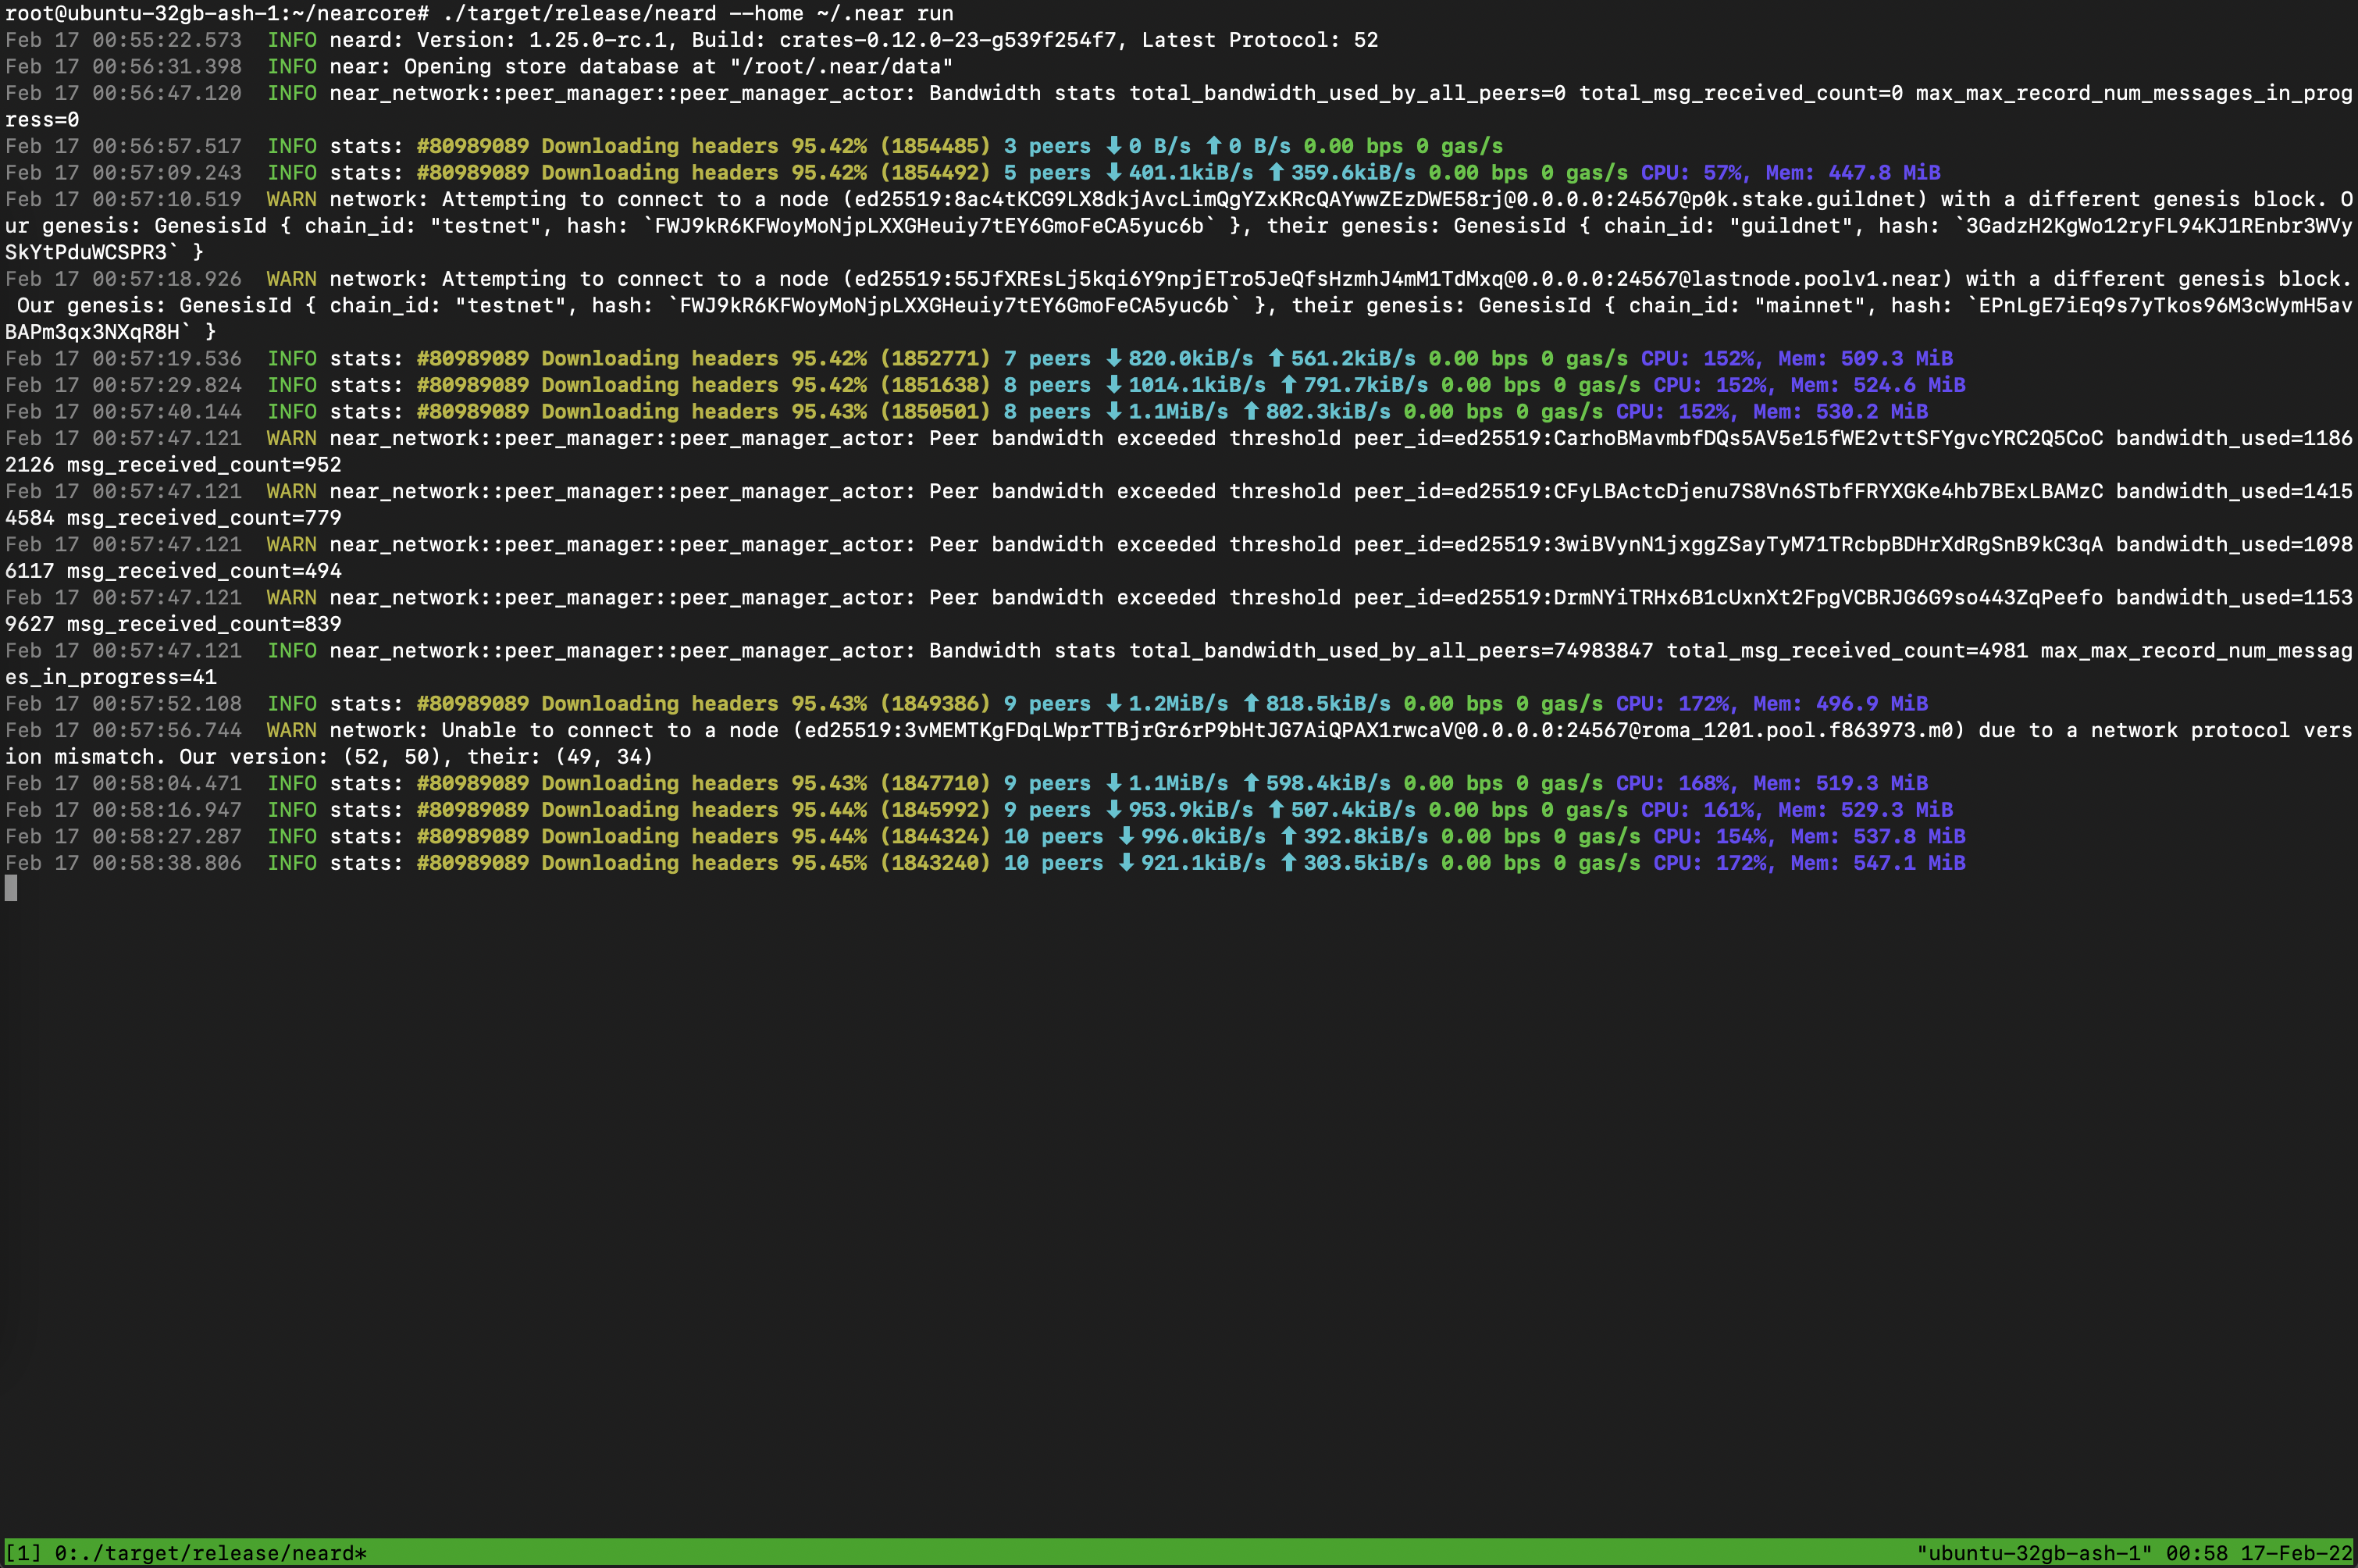 The node is now running you can see log outputs in your console. Your node should be find peers, download headers to 100%, and then download blocks.
Create a wallet
- MainNet: https://wallet.near.org/
- TestNet: https://wallet.testnet.near.org/
- GuildNet:
https://wallet.openshards.io/
Authorize Wallet Locally
A full access key needs to be installed locally to be able transactions via NEAR-CLI.
For Guildnet
export NEAR_ENV=testnet
- You need to run this command:
near login
Note: This command launches a web browser allowing for the authorization of a full access key to be copied locally.
1 – Copy the link in your browser

2 – Grant Access to Near CLI
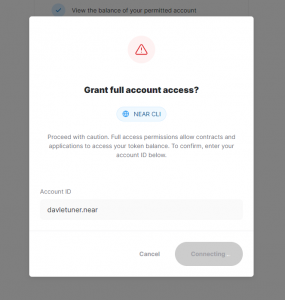
3 – After Grant, you will see a page like this, go back to console
4 – Enter your wallet and press Enter

For Guildnet
- Download the latest genesis and config files:
cd ~/.near/guildnet
wget -c https://s3.us-east-2.amazonaws.com/build.openshards.io/nearcore-deploy/guildnet/config.json
wget -c https://s3.us-east-2.amazonaws.com/build.openshards.io/nearcore-deploy/guildnet/genesis.json
- Launch this command so set the Near guildnet Environment:
export NEAR_ENV=guildnet
You can also run this command to set the Near guildnet Environment persistent:
echo 'export NEAR_ENV=guildnet' >> ~/.bashrc
For Testnet
- Download the latest genesis, config files:
cd ~/.near/testnet
wget -c https://s3-us-west-1.amazonaws.com/build.nearprotocol.com/nearcore-deploy/testnet/validator/config.json
wget -c https://s3-us-west-1.amazonaws.com/build.nearprotocol.com/nearcore-deploy/testnet/genesis.json
- Download the latest snapshot:
mkdir ~/.near/testnet/data
cd ~/.near/testnet
wget -c https://near-protocol-public.s3.amazonaws.com/backups/testnet/rpc/data.tar -O - | tar -xf -
- Launch this command so set the Near testnet Environment:
export NEAR_ENV=testnet
- You can also run this command to set the Near testnet Environment persistent:
echo 'export NEAR_ENV=testnet' >> ~/.bashrc
Note: This is the Chicken and the Egg. You have not created the staking pool, but need to provide the name.
Check the validator_key.json
- Run the following command:
For Guildnet
cat ~/.near/guildnet/validator_key.json
For Testnet
cat ~/.near/testnet/validator_key.json
Note: If a validator_key.json is not present, follow these steps to create one
Create a validator_key.json for Guildnet
- Generate the Key file:
near generate-key <pool_id>
- Copy the file generated to Guildnet folder:
Make sure to replace YOUR_WALLET by your accountId
cp ~/.near-credentials/guildnet/<YOUR_WALLET>.json ~/.near/guildnet/validator_key.json
Edit “account_id” =>
xx.stake.guildnet, where xx is your PoolNameChange
private_keytosecret_key
Note: The account_id must match the staking pool contract name or you will not be able to sign blocks.\
File content must be in the following pattern:
{
  "account_id": "xx.stake.guildnet",
  "public_key": "ed25519:HeaBJ3xLgvZacQWmEctTeUqyfSU4SDEnEwckWxd92W2G",
  "secret_key": "ed25519:****"
}
Create a validator_key.json for Testnet
- Generate the Key file:
near generate-key <pool_id>
- Copy the file generated to Testnet folder: Make sure to replace YOUR_WALLET by your accountId
cp ~/.near-credentials/testnet/YOUR_WALLET.json ~/.near/testnet/validator_key.json
- Edit “account_id” => xx.pool.f863973.m0, where xx is your PoolName
- Change
private_keytosecret_key
Note: The account_id must match the staking pool contract name or you will not be able to sign blocks.\
File content must be in the following pattern:
{
  "account_id": "xx.stake.guildnet",
  "public_key": "ed25519:HeaBJ3xLgvZacQWmEctTeUqyfSU4SDEnEwckWxd92W2G",
  "secret_key": "ed25519:****"
}
Step 8 – Check all files were generated
Command for Guildnet
ls ~/.near/guildnet
Command for Testnet
ls ~/.near/testnet
You should have: validator_key.json node_key.json config.json data genesis.json
Setup using NEARCore (MainNet)
RECOMMENDED FOR MAINNET
Step 1 – Installation required software & set the configuration
- Before you start, you might want to ensure your system is up to date.
sudo apt update && sudo apt upgrade -y
- Install Python
sudo apt install python3 git curl
- Install Building env
sudo apt install clang build-essential make
- Install Rust & Cargo
curl --proto '=https' --tlsv1.2 -sSf https://sh.rustup.rs | sh
Press 1 and press enter
- Source the environment
source $HOME/.cargo/env
- Clone the NEARCore Repo
git clone https://github.com/nearprotocol/nearcore.git
- Set environment to the latest release tag. For the latest release tag, please check here: https://github.com/near/nearcore/releases. Note: RC tags are for Testnet only.
export NEAR_RELEASE_VERSION=1.26.1
cd nearcore
git checkout $NEAR_RELEASE_VERSION
make release
- Install Nodejs and NPM
curl -sL https://deb.nodesource.com/setup_17.x | sudo -E bash -
sudo apt install build-essential nodejs
PATH="$PATH"
- Install Near CLI
Once NodeJs and NPM are installed you can now install NEAR-Cli.
Unless you are logged in as root, which is not recommended you will need to use sudo to install NEAR-Cli so that the near binary to /usr/local/bin
sudo npm install -g near-cli
- Launch this command so set the Near Mainnet Environment:
export NEAR_ENV=mainnet
- You can also run this command to set the Near testnet Environment persistent:
echo 'export NEAR_ENV=mainnet' >> ~/.bashrc
Step 2 – Create a wallet
MainNet: https://wallet.near.org/
Step 3 – Authorize Wallet Locally
A full access key needs to be installed locally to be able transactions via NEAR-Cli.
- You need to run this command:
near login
Note: This command launches a web browser allowing for the authorization of a full access key to be copied locally.
1 – Copy the link in your browser
2 – Grant Access to Near CLI
3 – After Grant, you will see a page like this, go back to console
4 – Enter your wallet and press Enter
Step 4 – Initialize & Start the Node
- Download the latest genesis, config files:
mkdir ~/.near
cd ~/.near
wget -c https://s3-us-west-1.amazonaws.com/build.nearprotocol.com/nearcore-deploy/mainnet/genesis.json
wget -c https://s3-us-west-1.amazonaws.com/build.nearprotocol.com/nearcore-deploy/mainnet/validator/config.json
Download the latest snapshot from the snapshot page.
Initialize NEAR:
target/release/neard init --chain-id="mainnet" --account-id=<staking pool id>
Create validator_key.json
- Generate the Key file:
near generate-key <pool_id>
- Copy the file generated to Mainnet folder.Make sure to replace YOUR_WALLET by your accountId
cp ~/.near-credentials/YOUR_WALLET.json ~/.near/mainnet/validator_key.json
- Edit “account_id” => xx.poolv1.near, where xx is your PoolName
- Change “private_key” to “secret_key”
Note: The account_id must match the staking pool contract name or you will not be able to sign blocks. File content must be something like : { "account_id": "xx.poolv1.near", "public_key": "ed25519:HeaBJ3xLgvZacQWmEctTeUqyfSU4SDEnEwckWxd92W2G", "secret_key": "ed25519:****" }
near generate-key <your_accountId>
vi ~/.near/{your_accountId}.json
Rename "private_key" to "secret_key", then move the file to ~/.near.
mv the file to ~/.near
Update "account_id" to be the staking_pool_id
Note: The account_id must match the staking pool contract name or you will not be able to sign blocks.
- Start the Node
target/release/neard run
- Setup Systemd Command:
sudo vi /etc/systemd/system/neard.service
Paste:
Description=NEARd Daemon Service

[Service]
Type=simple
User=<USER>
#Group=near
WorkingDirectory=/home/<USER>/.near
ExecStart=/home/<USER>/nearcore/target/release/neard run
StandardOutput=file:/home/<USER>/.near/neard.log
StandardError=file:/home/<USER>/.near/nearderror.log
Restart=on-failure
RestartSec=30
KillSignal=SIGINT
TimeoutStopSec=45
KillMode=mixed

[Install]
WantedBy=multi-user.target
Note: Change USER to your paths
Command:
sudo systemctl enable neard
Command:
sudo systemctl start neard
If you need to make a change to service because of an error in the file. It has to be reloaded:
sudo systemctl reload neard
Watch logs
Command:
journalctl -n 100 -f -u neard
Make log output in pretty print
Command:
sudo apt install ccze
View Logs with color
Command:
journalctl -n 100 -f -u neard | ccze -A
Becoming a Validator
In order to become a validator and enter the validator set, a minimum set of success criteria must be met.
- The node must be fully synced
- The
validator_key.jsonmust be in place - The contract must be initialized with the public_key in
validator_key.json - The account_id must be set to the staking pool contract id
- There must be enough delegations to meet the minimum seat price. See the seat price here.
- A proposal must be submitted by pinging the contract
- Once a proposal is accepted a validator must wait 2-3 epoch to enter the validator set
- Once in the validator set the validator must produce great than 90% of assigned blocks
Check running status of validator node. If “Validator” is showing up, your pool is selected in the current validators list.
Submitting Pool Information (Mainnet Only)
Adding pool information helps delegators and also helps with outreach for upgrades and other important announcements: https://github.com/zavodil/near-pool-details. The available fields to add are: https://github.com/zavodil/near-pool-details/blob/master/FIELDS.md.
The identifying information that we ask the validators:to provide are:
- Name
- Description
- URL
- Country and country code
- Email (for support)
- Telegram, Discord, or Twitter
Command:
near call name.near update_field '{"pool_id": "<pool_id>.poolv1.near", "name": "url", "value": "https://yoururl.com"}' --accountId=<accountId>.near --gas=200000000000000
near call name.near update_field '{"pool_id": "<pool_id>.poolv1.near", "name": "twitter", "value": "<twitter>"}' --accountId=<account id>.near --gas=200000000000000
near view name.near get_all_fields '{"from_index": 0, "limit": 3}'
near view name.near get_fields_by_pool '{"pool_id": "<pool_id>.poolv1.near"}'
LESSON 4 - STAKING POOLS
NEAR uses a staking pool factory with a whitelisted staking contract to ensure delegators’ funds are safe. In order to run a validator on NEAR, a staking pool must be deployed to a NEAR account and integrated into a NEAR validator node. Delegators must use a UI or the command line to stake to the pool. A staking pool is a smart contract that is deployed to a NEAR account.
Deploy a Staking Pool Contract
Deploy a Staking Pool
Calls the staking pool factory, creates a new staking pool with the specified name, and deploys it to the indicated accountId.
For Guildnet
near call stake.guildnet create_staking_pool '{"staking_pool_id": "<pool id>", "owner_id": "<accountId>", "stake_public_key": "<public key>", "reward_fee_fraction": {"numerator": 5, "denominator": 100}}' --accountId="<accountId>" --amount=30 --gas=300000000000000
For Testnet
near call pool.f863973.m0 create_staking_pool '{"staking_pool_id": "<pool id>", "owner_id": "<accountId>", "stake_public_key": "<public key>", "reward_fee_fraction": {"numerator": 5, "denominator": 100}}' --accountId="<accountId>" --amount=30 --gas=300000000000000
For Mainnet
near call poolv1.near create_staking_pool '{"staking_pool_id": "<pool id>", "owner_id": "<accountId>", "stake_public_key": "<public key>", "reward_fee_fraction": {"numerator": 5, "denominator": 100}}' --accountId="<accountId>" --amount=30 --gas=300000000000000
From the example above, you need to replace:
- Pool ID: Staking pool name, the factory automatically adds its name to this parameter, creating {pool_id}.{staking_pool_factory} Examples:
nearkat.stake.guildnetfor guildnetnearkat.pool.f863973.m0for testnetnearkat.poolv1.nearfor mainnet
- Owner ID: The NEAR account that will manage the staking pool. Usually your main NEAR account.
- Public Key: The public key in your validator_key.json file.
- 5: The fee the pool will charge (e.g. in this case 5 over 100 is 5% of fees).
- Account Id: The NEAR account deploying the staking pool.
Be sure to have at least 30 NEAR available, it is the minimum required for storage.
To change the pool parameters, such as changing the amount of commission charged to 1% in the example below, use this command:
near call <pool_name> update_reward_fee_fraction '{"reward_fee_fraction": {"numerator": 1, "denominator": 100}}' --accountId <account_id> --gas=300000000000000
You will see something like this:

If there is a “True” at the End. Your pool is created.
You have now configure your Staking pool.
For Guildnet & Testnet You can go to OSA Discord to ask for some guildnet or testnet token to be a validator, https://discord.gg/GrBqK3ZJ2T
Configure your staking pool contract
Replace:
- Pool Name – pool_id.staking_pool_factory
- Owner Id
- Public Key
- Reward Fraction
- Account Id
near call <pool name> new '{"owner_id": "<owner id>", "<public key>": "<public key>", "reward_fee_fraction": {"numerator": <reward fraction>, "denominator": 100}}' --accountId <accountId>
Manage your staking pool contract
HINT: Copy/Paste everything after this line into a text editor and use search and replace. Once your pool is deployed, you can issue the commands below:
Retrieve the owner ID of the staking pool
Command:
near view {pool_id}.{staking_pool_factory} get_owner_id '{}'
Issue this command to retrieve the public key the network has for your validator
Command:
near view {pool_id}.{staking_pool_factory} get_staking_key '{}'
If the public key does not match you can update the staking key like this (replace the pubkey below with the key in your validator.json file)
near call {pool_id}.{staking_pool_factory} update_staking_key '{"stake_public_key": "<public key>"}' --accountId <accountId>
Working with Staking Pools
NOTE: Your validator must be fully synced before issuing a proposal or depositing funds.
Proposals
In order to get a validator seat you must first submit a proposal with an appropriate amount of stake. Proposals are sent for epoch +2. Meaning if you send a proposal now, if approved, you would get the seat in 3 epochs. You should submit a proposal every epoch to ensure your seat. To send a proposal we use the ping command. A proposal is also sent if a stake or unstake command is sent to the staking pool contract.
To note, a ping also updates the staking balances for your delegators. A ping should be issued each epoch to keep reported rewards current on the pool contract. You could set up a ping using a cron job.
Staking Pools Factories for each network:
- GuildNet: stake.guildnet
- TestNet: pool.f863973.m0
- MainNet: poolv1.near
Transactions
Deposit and Stake NEAR
Command:
near call <staking_pool_id> deposit_and_stake --amount <amount> --accountId <accountId> --gas=300000000000000
Unstake NEAR
Amount in yoctoNEAR.
Run the following command to unstake:
near call <staking_pool_id> unstake '{"amount": "<amount yoctoNEAR>"}' --accountId <accountId> --gas=300000000000000
To unstake all you can run this one:
near call <staking_pool_id> unstake_all --accountId <accountId> --gas=300000000000000
Withdraw
Unstaking takes 2-3 epochs to complete, after that period you can withdraw in YoctoNEAR from pool.
Command:
near call <staking_pool_id> withdraw '{"amount": "<amount yoctoNEAR>"}' --accountId <accountId> --gas=300000000000000
Command to withdraw all:
near call <staking_pool_id> withdraw_all --accountId <accountId> --gas=300000000000000
Ping
A ping issues a new proposal and updates the staking balances for your delegators. A ping should be issued each epoch to keep reported rewards current.
Command:
near call <staking_pool_id> ping '{}' --accountId <accountId> --gas=300000000000000
Balances Total Balance Command:
near view <staking_pool_id> get_account_total_balance '{"account_id": "<accountId>"}' --gas=300000000000000
Staked Balance
Command:
near view <staking_pool_id> get_account_staked_balance '{"account_id": "<accountId>"}'
Unstaked Balance
Command:
near view <staking_pool_id> get_account_unstaked_balance '{"account_id": "<accountId>"}'
Available for Withdrawal
You can only withdraw funds from a contract if they are unlocked.
Command:
near view <staking_pool_id> is_account_unstaked_balance_available '{"account_id": "<accountId>"}'
Pause / Resume Staking
Pause
Command:
near call <staking_pool_id> pause_staking '{}' --accountId <accountId>
Resume
Command:
near call <staking_pool_id> resume_staking '{}' --accountId <accountId>
LESSON 5 - MONITORING
Log Files
The log file is stored in systemd depending on your setup.
Systemd Command:
journalctl -n 100 -f -u neard | ccze -A
Log file sample:
Validator | 1 validator
INFO stats: #85079829 H1GUabkB7TW2K2yhZqZ7G47gnpS7ESqicDMNyb9EE6tf Validator 73 validators 30 peers ⬇ 506.1kiB/s ⬆ 428.3kiB/s 1.20 bps 62.08 Tgas/s CPU: 23%, Mem: 7.4 GiB
- Validator: A “Validator” will indicate you are an active validator
- 73 validators: Total 73 validators on the network
- 30 peers: You current have 30 peers. You need at least 3 peers to reach consensus and start validating
- #46199418: block – Look to ensure blocks are moving
RPC
Any node within the network offers RPC services on port 3030 as long as the port is open in the nodes firewall. The NEAR-CLI uses RPC calls behind the scenes. Common uses for RPC are to check on validator stats, node version and to see delegator stake, although it can be used to interact with the blockchain, accounts and contracts overall.
Find many commands and how to use them in more detail here:
Command:
sudo apt install curl jq
Common Commands:
Check your node version:
Command:
curl -s http://127.0.0.1:3030/status | jq .version
Check Delegators and Stake
Command:
near view <your pool>.stake.guildnet get_accounts '{"from_index": 0, "limit": 10}' --accountId <accountId>.guildnet
Check Reason Validator Kicked
Command:
curl -s -d '{"jsonrpc": "2.0", "method": "validators", "id": "dontcare", "params": [null]}' -H 'Content-Type: application/json' https://rpc.openshards.io | jq -c ".result.prev_epoch_kickout[] | select(.account_id | contains ("<POOL_ID>"))" | jq .reason
Check Blocks Produced / Expected
Command:
curl -s -d '{"jsonrpc": "2.0", "method": "validators", "id": "dontcare", "params": [null]}' -H 'Content-Type: application/json' http://localhost:3030/ | jq -c ".result.current_validators[] | select(.account_id | contains ("POOL_ID"))"
Prometheus
Monitoring disk, CPU, memory, network io, missed blocks, and peers is critically important to a healthy node. Prometheus and Grafana combined provide monitoring and visual reporting tools. Please note that Prometheus is best set up on another machine due the storage requirement for logs.
Installation
Command:
sudo apt-get update
Command:
sudo apt-get install prometheus prometheus-node-exporter prometheus-pushgateway
prometheus-alertmanager
Check that Prometheus was installed and is in your path.
prometheus --version
Start Services
Command:
sudo systemctl status prometheus
Command:
sudo systemctl status prometheus-node-exporter
Command:
sudo vi /etc/prometheus/prometheus.yml
Update the targets and save
targets: [‘localhost:9093’, ‘localhost:3030’]
Reference the rules file
Load rules once and periodically evaluate them according to the global 'evaluation_interval'.
rule_files:

- "rules.yml"
Setup Postfix email
Command:
sudo apt-get install mailutils
Setup Responses
- internet site
- enter a domain name (Used for the from email address)
Command
sudo vi /etc/postfix/main.cf
Update and save the config file
- inet_interfaces = all to inet_interfaces = localhost
- inet_protocols = all to inet_protocols = ipv4
Restart postfix
Command:
sudo service postfix restart
Add the hostname used with Postfix
Command:
sudo vi /etc/hostname
Command
sudo nano /etc/hosts
Send a test email
echo "This is the body of the email" | mail -s "This is the subject line" user@example.com
Update rules.yml
Command:
sudo vi /etc/prometheus/rules.yml
groups:
  - name: near
    rules:
      - alert: InstanceDown
        expr: up == 0
        for: 1m
        labels:
          severity: "critical"
        annotations:
          summary: "Endpoint {{ $labels.instance }} down"
          description: "{{ $labels.instance }} of job {{ $labels.job }} "
      - alert: NearVersionBuildNotMatched
        expr: near_version_build{instance="yournode.io", job="near"} != near_dev_version_build{instance="yournode.io", job="near"}
        for: 5m
        labels:
          severity: critical
        annotations:
          summary: "Near Node Version needs updated."
          description: "Your version is out of date and you risk getting kicked."
      - alert: StakeBelowSeatPrice
        expr: abs((near_current_stake / near_seat_price) * 100) < 100
        for: 2m
        labels:
          severity: critical
        annotations:
          description: 'Pool is below the current seat price'
Restart services
Command:
sudo systemctl restart prometheus
Command:
sudo systemctl status prometheus
sudo systemctl status prometheus
Grafana
Download and add the package
Command:
wget -q -O - https://packages.grafana.com/gpg.key | sudo apt-key add -
Command:
sudo add-apt-repository "deb https://packages.grafana.com/oss/deb stable main"
Command:
sudo apt-get install grafana
Setup Rules
Command:
sudo vi /etc/prometheus/rules.yml
- job_name: validator
  - static_configs:
    - targets: ['localhost:9093']
Update alert manager
Command:
sudo vi /etc/init.d/prometheus-alertmanager
NAME=prometheus-alertmanager
Set the command-line arguments
Command:
sudo vi /etc/default/prometheus-alertmanager
ARGS="--cluster.listen-address="
Start & Reload services
Command:
sudo systemctl daemon-reload
sudo systemctl enable grafana-server.service
sudo systemctl start grafana-server
sudo service grafana-server status
Install additional plugins
sudo grafana-cli plugins install simpod-json-datasource
sudo grafana-cli plugins install ryantxu-ajax-panel
Restart service and update password
service grafana-server restart
sudo grafana-cli admin reset-admin-password admin
Open Ports to specific IP
Command:
sudo iptables -L
Command:
sudo iptables -A INPUT -p tcp --dport 3000 -s 66.73.0.194 -j ACCEPT
sudo netfilter-persistent save
sudo netfilter-persistent reload
Create Dashboard
- Add datasource Prometheus
- Add Notification channel email
- Config grafana email
Command
sudo vi /etc/grafana/grafana.ini
enabled = true
host = localhost:25
skip_verify = true
from_address = moinitor@yournode.com
from_name = Validator
Restart service
service grafana-server restart
Watch logs
sudo tail -f /var/log/grafana/grafana.log
Install Prometheus Exporter
Command:
sudo apt install golang-go
git clone https://github.com/masknetgoal634/near-prometheus-exporter.git
cd near-prometheus-exporter/
go build -a -installsuffix cgo -ldflags="-w -s" -o main .
Start exporter
Command:
./main -accountId <contract account id>
netstat -an | grep 9333
Update Prometheus
Command:
sudo vi /etc/prometheus/prometheus.yml
- job_name: near-node
scrape_interval: 15s
static_configs:
- targets: ['<NODE_IP_ADDRESS>:3030']
Update AlertManager
sudo vi /etc/prometheus/alertmanager.yml
postqueue -p
amtool alert
promtool check rules /etc/prometheus/rules.yml
promtool check config /etc/prometheus/prometheus.yml
amtool check-config /etc/prometheus/alertmanager.yml
cd near-prometheus-exporter/
mv main near-exporter
sudo vi /lib/systemd/system/near-exporter.service
[Unit]

Description=NEAR Prometheus Exporter

[Service]

Restart=always

User=prometheus

EnvironmentFile=/etc/default/near-exporter

ExecStart=/opt/near-prometheus-exporter/near-exporter $ARGS

ExecReload=/bin/kill -HUP $MAINPID

TimeoutStopSec=20s

SendSIGKILL=no

[Install]

WantedBy=multi-user.target
Update exporter
Command:
sudo vi /etc/default/near-exporter

# Set the command-line arguments to pass to the server.

# Set you contract name

ARGS="-accountId yournode"
Copy config and start service
Command:
sudo cp /lib/systemd/system/near-exporter.service /etc/systemd/system/near-exporter.service
sudo chmod 644 /etc/systemd/system/near-exporter.service
sudo systemctl start near-exporter
sudo systemctl status near-exporter
ps -elf | grep near-exporter
netstat -an | grep 9333
sudo systemctl enable near-exporter
LESSON 6 - TROUBLESHOOTING
In this lesson you will learn about:
- Keys
- Common Errors
Keys
NEAR uses cryptographic keys to secure accounts and validators, each key has a public and matching private key pair.
Find more detailed information about NEAR and keys: https://docs.near.org/concepts/basics/account#access-keys
Validator Keys:
To manage and sign transactions a node_key and validator_key.
Node Key:
Used to communicate with other peers and is primarily responsible for syncing the blockchain.
~/.near/<network>/node_key.json
Common Issue:
In a failure situation, both the node_key and validator_key must be copied over
Validator Key:
Used to sign and validate blocks.
~/.near/<network>/validator_key.json
Common Issues:
- The validator key used to initialize the staking contract is not the one listed in validator_key.json
- The account Id used when the node was initialized is not the same as the one in validator_key.json
Common Errors & Solutions
Submitting a proposal before the validator is synced
A validator must be fully synced before submitting a proposal to enter the validator set. If you are not fully synced and you entered the validator set your log will be filled with errors.
Resolution Wait until 4 epochs until you have been kicked from the validator set. Delete the data directory and resync. Be sure to be fully synced before staking actions or pings go to your pool.
1. Stop the node
2. rm -Rf ~/.near/<NETWORK_ID>/data
3. Start the node
Starting the node when another instance is running
On occasion, a process will get disconnected from the shell. The common error seen when trying to start the node will be:
Err value: Os { code: 98, kind: AddrInUse, message: "Address already in use" }',
Resolution Find the pid of the running process
ps -elf | grep neard
Kill the hung pid
kill -9 <PID>
Running out of Disk space
If you find no space left on device errors in the validator log files then you likely ran out of disk space.
1. Stop the node
2. Failover to a backup node
3. Cleanup files or resize disk
4. Fail back over.
Not enough stake to obtain a validator seat
You can check that your validator proposal was accepted by checking
near proposals
Not producing blocks
Your validator is producing zero blocks in near validators current.
This is due the staking pool contract and the validator_key.json have different public keys or the account_id in validator_key.json not being the staking pool contract id.
Get the staking pool key
near view <POOL_ID> get_staking_key '{}'
Get the key in validator_key.json
cat ~/.near/<network>/validator_key.json | grep public_key
Note: Both keys must match. If they do not update the staking pool key and wait 2 epochs before pinging.
Update staking pool key
near call <POOL_ID> update_staking_key '{"stake_public_key": "<PUBLIC_KEY>"}' --accountId <ACCOUNT_ID>
Check the account_id is set to the staking pool contract
vi ~/.near/<network>/validator_key.json
"account_id" = <staking pool id>
Note: if it does now match the staking pool id upate it and restart your node.
Not producing enough blocks or chunks
Missing blocks or chunks is the primary reason a validator is kicked from the validator pool. You can check the number of blocks expected/missed via NEAR-Cli and RPC.
NEAR-CLI
near validators current | grep <pool id>
RPC
curl -s -d '{"jsonrpc": "2.0", "method": "validators", "id": "dontcare", "params": [null]}' -H 'Content-Type: application/json' http://localhost:3030/ | jq -c ".result.current_validators[] | select(.account_id | contains ("<POOL_ID>"))"
Check the reason kicked
curl -s -d '{"jsonrpc": "2.0", "method": "validators", "id": "dontcare", "params": [null]}' -H 'Content-Type: application/json' https://rpc.openshards.io | jq -c ".result.prev_epoch_kickout[] | select(.account_id | contains ("<POOL_ID>"))" | jq .reason
Not exporting the correct environment
Be sure that you are using the correct environment each time you run NEAR-Cli
export NEAR_ENV=<mainnet,testnet,guildnet>
Incompatible CPU without AVX support
One cause of missed blocks and nodes falling out of sync is running on a CPU without AVX support. AVX support is required, but not always used depending on the complexity of the transaction.
Not running on SSD drives
NEAR Requires a 1 second block time and HDD disks are just not fast enough. SDD drives are required and SSD NVME drives are recommended.
Inconsistent Internet connection
NEAR requires a 1 second block time, so any latency from your internet provider can cause you to miss blocks.
Inability to gain enough peers for consensus
If you are unable to gain any peers a restart can help. In some rare cases the boot_nodes in config.json can be empty.
Logs like that :
INFO stats: #42376888 Waiting for peers 0/0/40 peers ⬇ 0 B/s ⬆ 0 B/s 0.00 bps 0 gas/s CPU: 2%, Mem: 91.3 MiB
Resolution Download the latest config.json file and restart:
- For Testnet:
https://s3-us-west-1.amazonaws.com/build.nearprotocol.com/nearcore-deploy/testnet/validator/config.json - For Mainnet:
https://s3-us-west-1.amazonaws.com/build.nearprotocol.com/nearcore-deploy/mainnet/validator/config.json
LESSON 7 - NODE FAILOVER
It is an unspoken requirement to maintain a secondary node in a different location in the event of a hardware or network failure on your primary node.
You will need to set up a standard node (without a validator key) and a different node_key. The node will be set up using the normal process see Setup a Validator Node.
Note: The backup node must track the same shard in the config.json as the primary node, to be used as a failover node. Please confirm the backp node has the the same config.json as the primary node.
"tracked_shards":[0],
Failing Over
To failover you must copy the node_key.json and the validatory_key.json to the secondary node and restart.
1. Copy over node_key.json
2. Copy over validator_key.json
4. Stop the node primary node
3. Stop the secondary node
4. Restart the secondary node
When failing back over to the primary simply move the secondary node_key.json into place and restart the services in reverse order.
Got a question?
Ask it on StackOverflow!